Have you ever visited a website where you have one long-form which you have to fill? Annoying and overwhelming. But how about we divide the form into several sections, that will make it look easier at least, right? That’s where multi-step forms come in handy.
You can easily increase the conversions of your Form by using WPForms to create a multi-step form – a plugin that is the simplest to use as a website owner.
Let’s have an in-depth look at what multi-step forms are, why use them, and how to create one using the elegant WPForms plugin.
What is a Multi-step form?
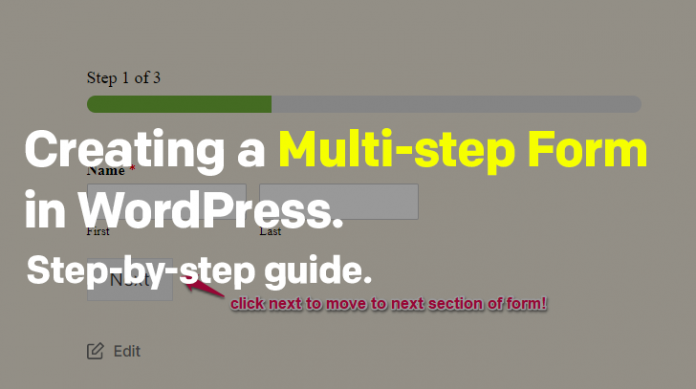
A multi-step or a multi-page form is a type of webform that is divided into a number of sections. It makes it easier to categorize various sections of a form.
For example, having a multi-step checkout in WooCommerce helps divide it into three separate sections: Billing, Shipping, Payment.
Table of Contents
Why create multi-step forms?
There are a number of reasons why one would prefer using a multi-step form on their website. Some of its benefits include:
- More form conversions on your website.
- Simplify the process of filling forms on your site.
- Arrange various sections of your forms and categorize the information that you need from your visitors.
- If a visitor sees a form that looks simpler to fill, they are more likely to submit it.
- WPForms has a very good user experience, with a very nice button and fields layout.
- Visitors will do complete form submissions.
- Using Conditional Logic feature, you can decide which fields to show to the visitor depending upon their selection.
Check out more useful features of WPForms.
Create a Multi-step form in WordPress in 3 Simple Steps
Installing a plugin in WordPress is a beginner task, and can be done very simply. Still, if you do not know how to do it, you can follow the instructions in this post from WPBeginner about How to install a plugin in WordPress. After this is done, follow the steps below to create a multi-step form.
1. Add a New Form in WPForms
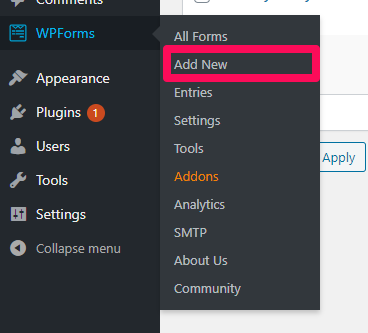
After the plugin is installed, the “WPForms” section will appear in the WordPress Admin Dashboard. Hover on WPForms and click “Add New”
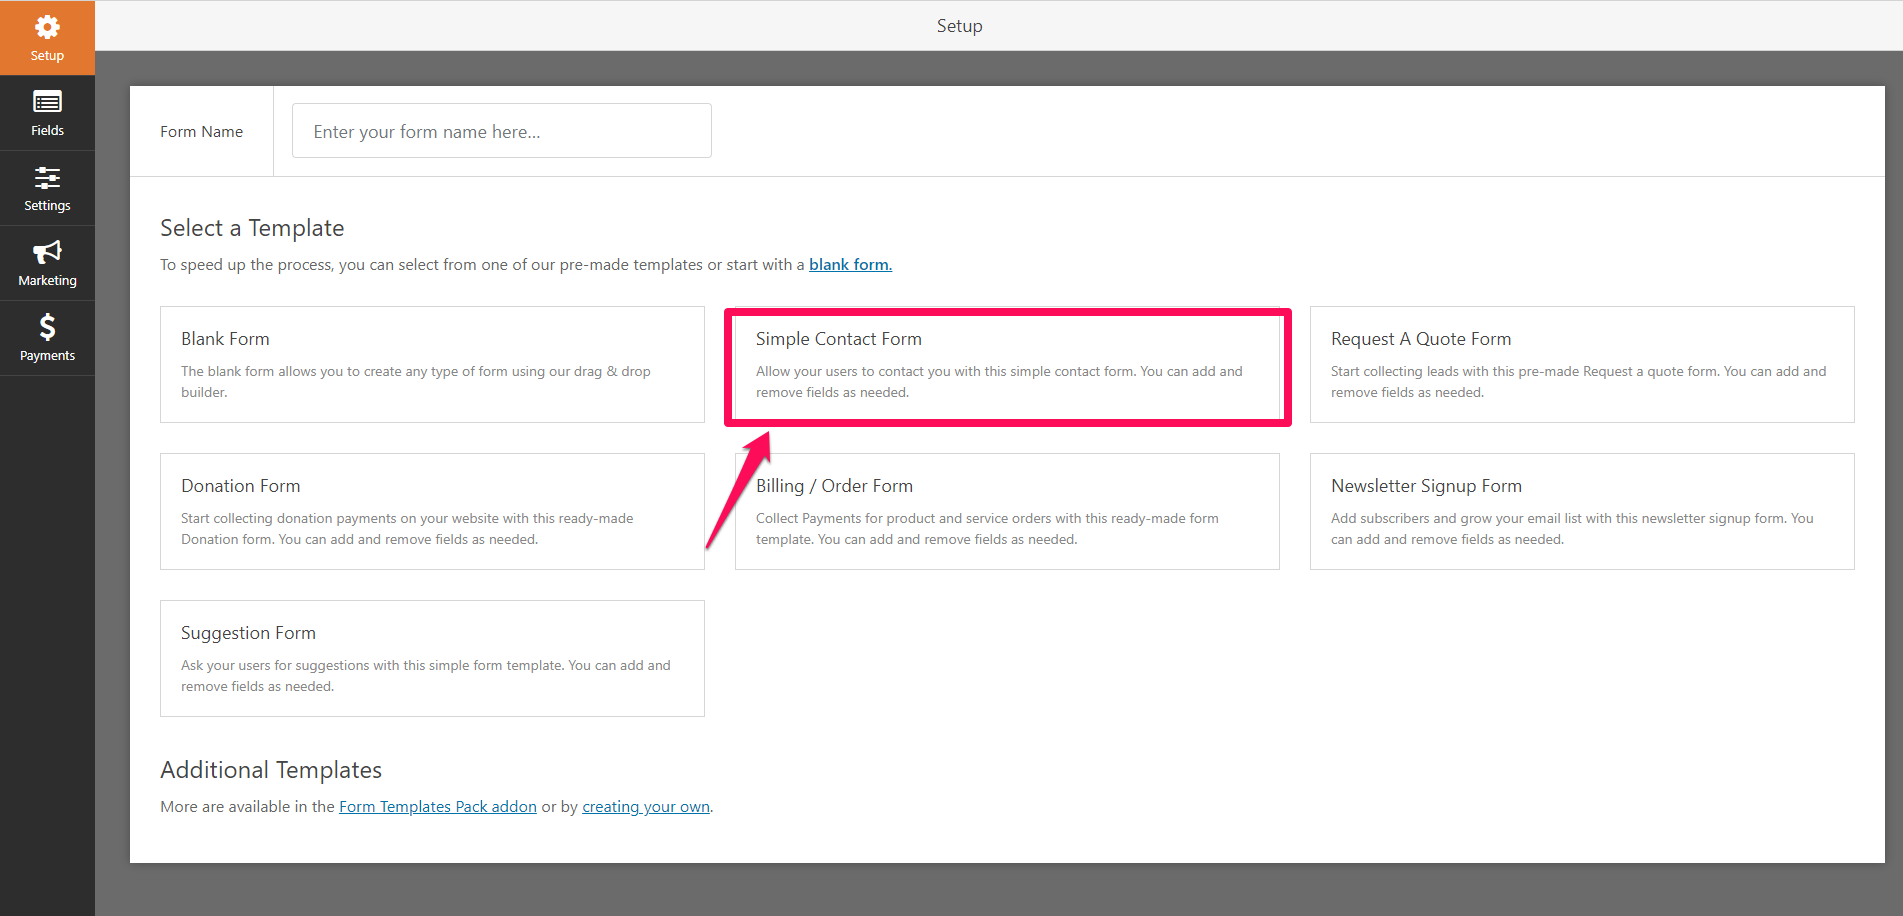
On the next page, you’ll have option to create a new form or choose between various pre-made forms by WPForms. For this article, we will create a “Simple Contact Form” but you can also create one of your choice.
2. Add the “Page Break” field element to create a multi-step form
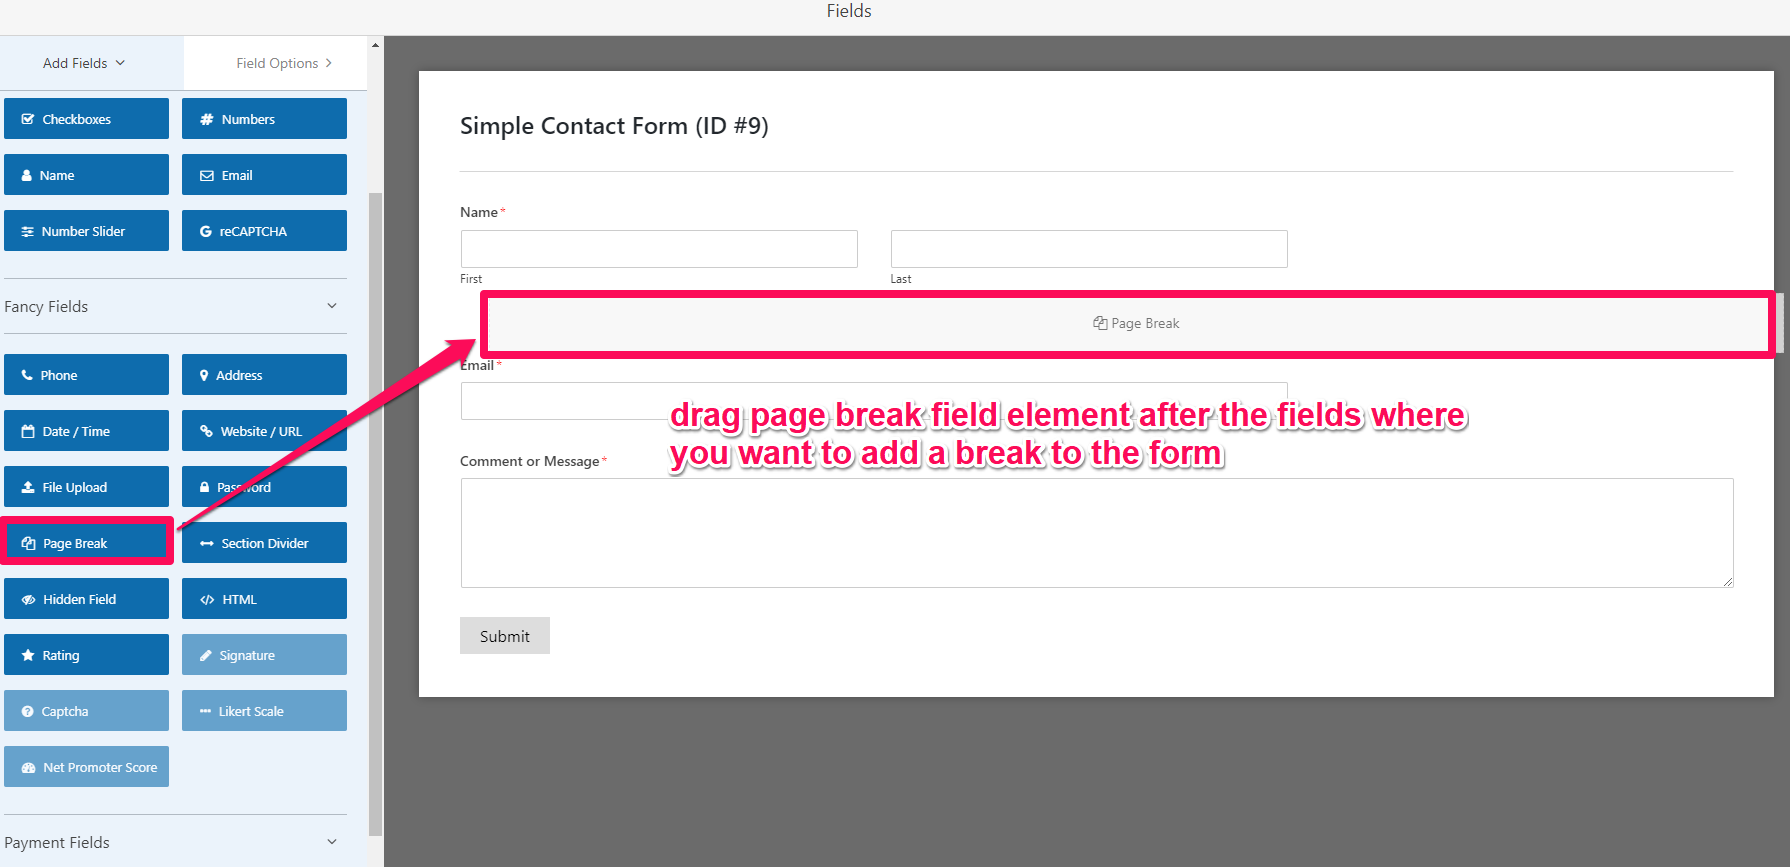
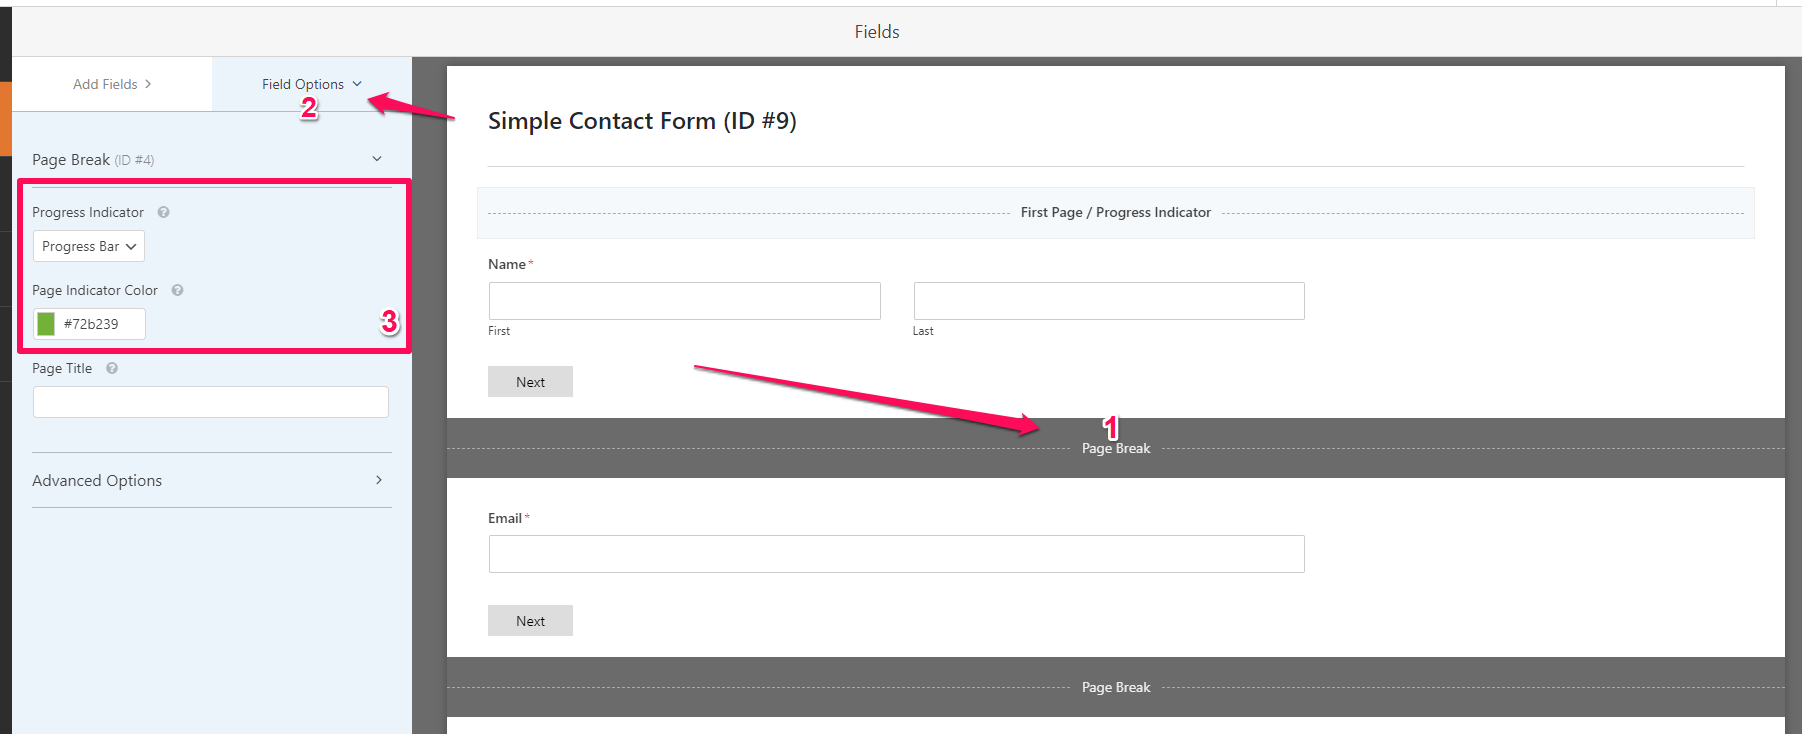
After adding the form, from the left side drag the “Page Break” field to the place where you want the form to show the next button (For example, If after first and last name you want the visitor to fill the other fields in the next step then add a page break after those fields.)
The page break element is included within the basic license for WPForms, some plugins offer this feature as a separate add-on plugin but it’s included within WPForms which makes it worth the purchase.
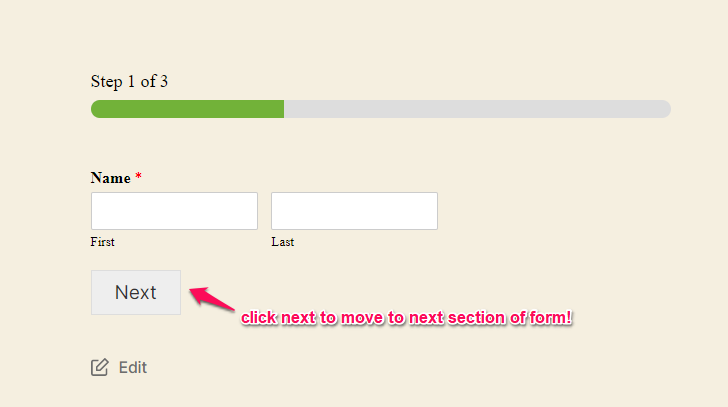
By adding the page break element, a “Next” button is added to the exact place where you add the element. This button helps the visitors move to the next section of the contact form after they have filled the fields on step 1,2,3 and so on.
3. Add the form to your page
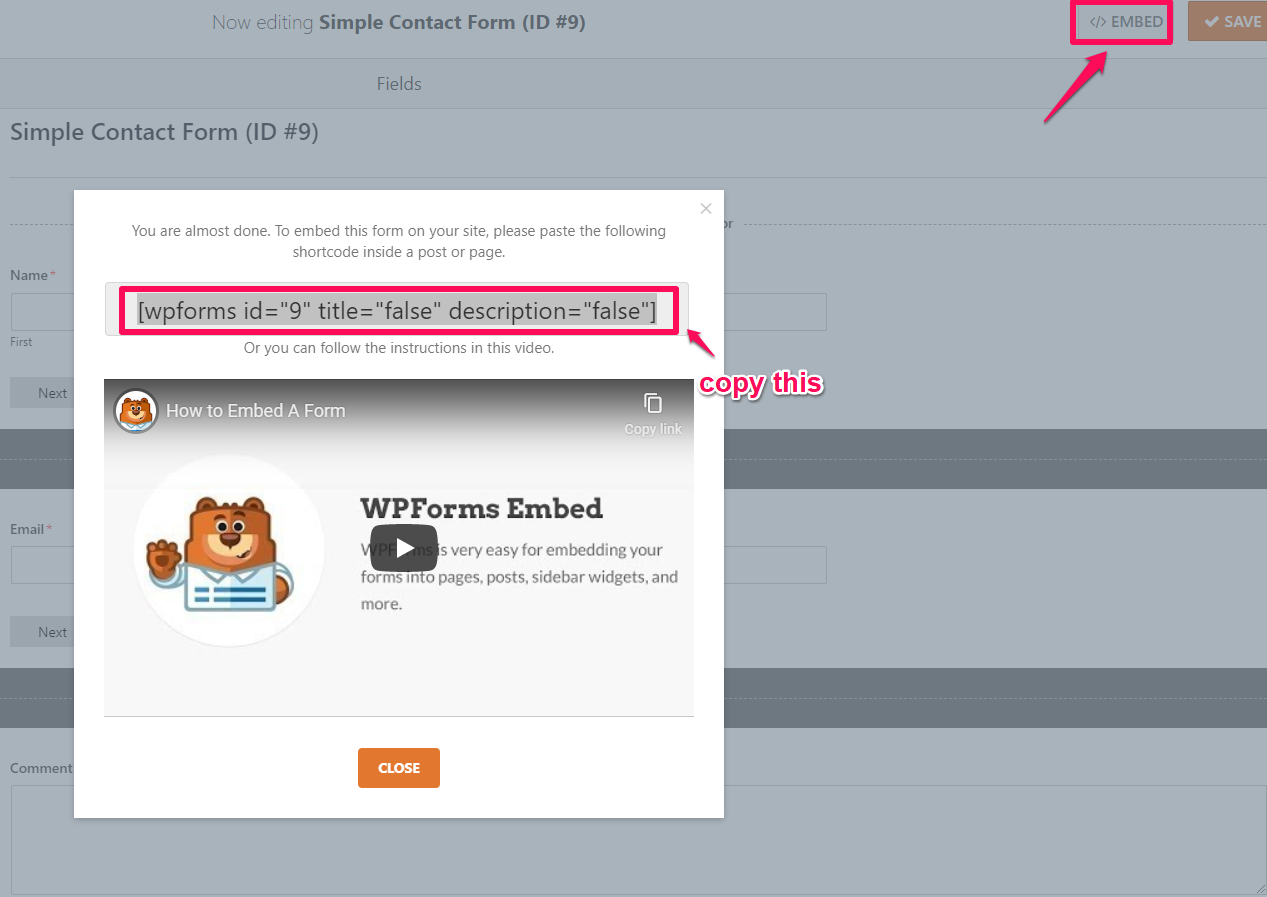
The final step is simple and might be something you already know how to do. After the form is created, save it and click on “Embed” at the top right of the page.
The popup with the form shortcode will show. Copy the form shortcode from here.
Create a new page or edit an existing page where you want to add the form. Paste the WPForms shortcode to the place where you want the form to be shown.
Save the page. That’s it! You can see the new form on your page:
Customizing the Multi-step Form
WPForms also provides a very simple interface to customize the look of the multi-step form to make it look how you need. Check out the few options below that you can use to customize the form.
Progress Bar
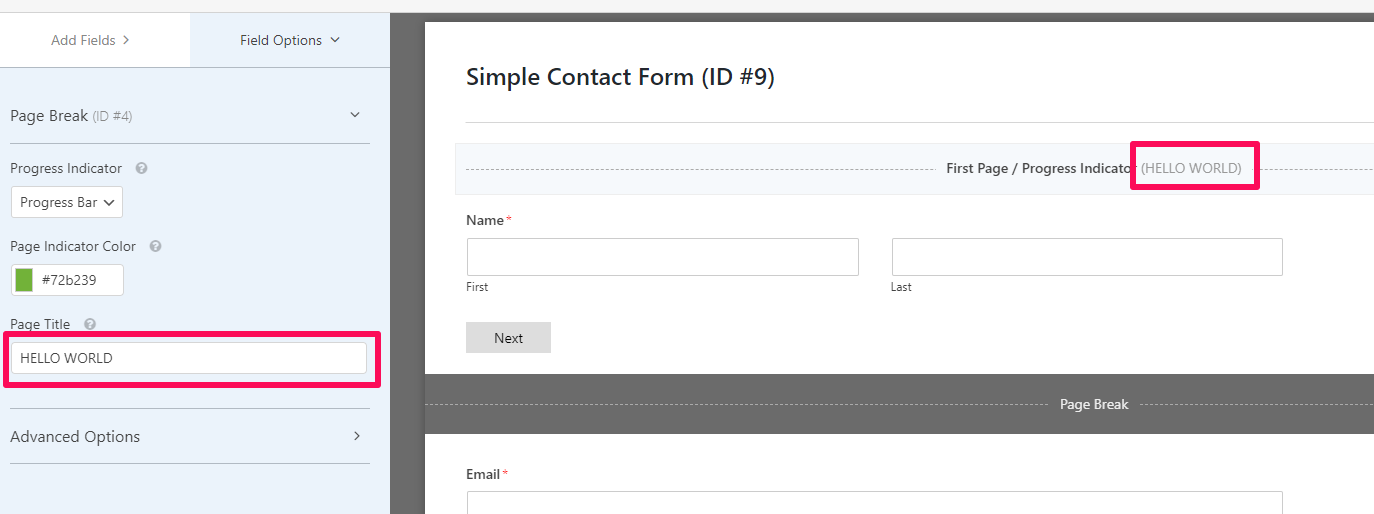
Click on the Page break element that you added, then go to “Field Options” and you will have the option to customize the progress bar and how it looks.
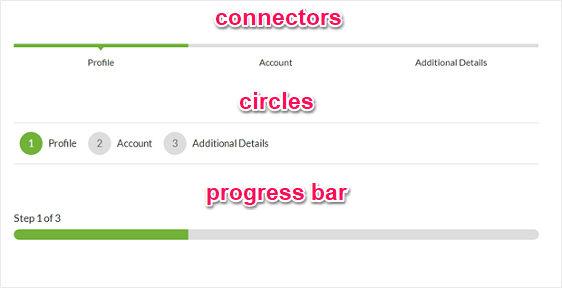
You can change the color code of the progress indicator here. The progress bar has three different styles.
- Connectors: shows a bar that connects titles of each step of your multi-step form.
- Circles: shows a circle and title for each step on your multi-step form.
- Progress Bar: indicates how much form has been filled.
Form Step Title
In the above section, you can add “Page Title” to show title for the steps of the form.
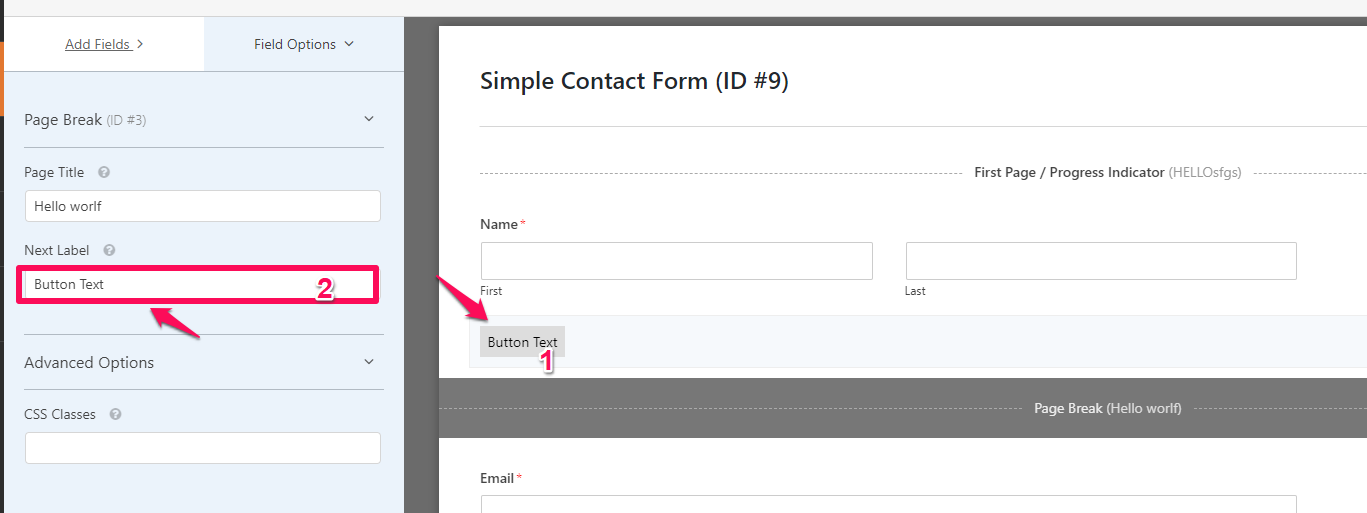
Next Button Text
You can click on the “Next” button to change its text.
Conclusion
This article just covers how to add a multi-step form and customize it. However, WPForms has a lot to offer which you can read in more details on their official article: How to Create a Multi-Step Form in WordPress (Without Code)
They also explain how to handle notifications in the form you created above and how to change the general settings of WPForms.
If you don’t like reading, watch this official video tutorial by WPForms on this topic:
Let me know in the comments below if you need more help regarding WordPress Forms on this blog.

